
So at this point we have a single node kubernetes cluster that can publish load-balanced IPs for applications. Which is totally cool, except now we’re faced with a new problem. We need to figure out if the cluster is actually compliant and worth using. This is where the problem of custom built kubernetes becomes more a problem with automation, in terms of how you build your cluster, and standardization. We need to ensure that each cluster built is compliant with CNCF(The big k8s people in the sky) and repeatable so our Devs can have a production cluster and dev cluster that is a mirror standard of each other.
This is where cluster scanners/audit programs are extremely usable to ensure that what we are running is good for applicaitons as well as CNCF. This blog I plan to look at Sonobuoy, and Octant
Sonobuoy
Installing the product is interesting because up to this point we’ve ran everything on the raspberry pi. Now its time to treat that pi “cluster” as an actual remote cluster that can be connected to. That calls for you to install kubectl on your actual machine. This can be done different ways. The easiest for most, is to install Docker Desktop on your machine. This will install the kubectl command as well as docker, and also give you the ability to run kubernetes locally(if your interested). For now lets just focus on the kubectl installation and how we can connect to the pi cluster.
Every installation of kubernetes stores a config for the default admin to connect to it. This is stored in “/etc/kubernetes/admin.conf” on the main k8s node. Pulling this information locally can be as easy as copying this information into “~/.kube/config”, so doing this on your laptop/desktop would be the same process. Basically, you will have a “.kube/config” file either in your C:\ drive or in your /home drive for your user(“/home/user/.kube”)(“/Users/username/.kube” for Mac). All you will need to do is copy the admin.conf from the pi cluster into your local drive. I wouldn’t do this in production as your basically pulling the root account into your machine. In a production environment creating users and tokens/certificates is your go to process, but I really don’t want to dig into that quite yet.
Once you’ve copied the /etc/kubernetes/admin.conf into your local .kube folder you should be able to run a simple, “kubectl get nodes” and see your pi server node come up.

Once you have this working you can run different applications against the cluster.
I use a Mac which means I have Homebrew and a happy life. BUT HOMEBREW DOESN’T DOWNLOAD SONOBUOY… c’mon homebrew. So I have to download the file, unzip, and move it to my PATH like a peasant.
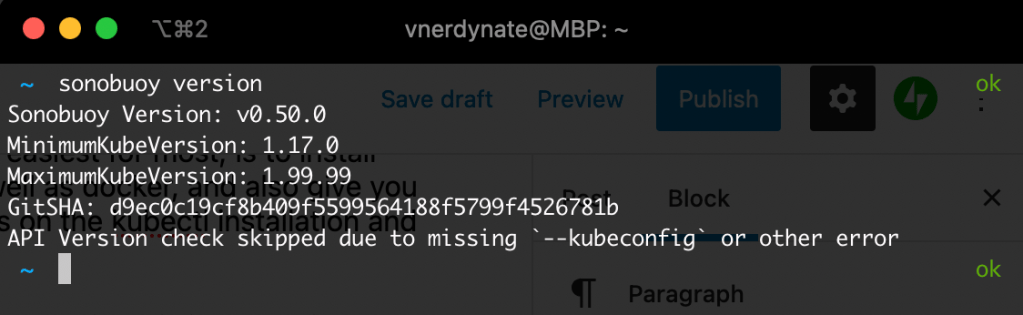
Once you have this working, you can run your sonobuoy version to verify its good:
Now you can check the overall status of the cluster by running “sonobuoy run –wait” to run a longer regular scan, or you can run “sonobuoy run –mode quick” to do a faster scan. I’m impatient…

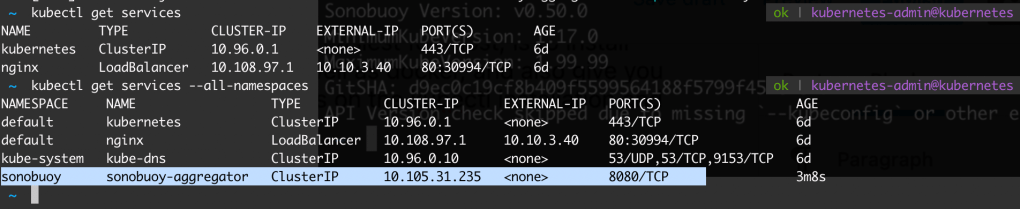
So when this runs you can see a number of resources that are spun up in the cluster to verify they can be. You would see errors, or warnings when it cant do what it needs to do. If you dont know what these resources are, then maybe another blog on what each of these are will help. but you can run a “kubectl get …” for whatever resource it deployed.
Ok so stuff was built and verified, so lets check those results. You will run two commands, one to find the tarball file which has the results, export it, and then pull that file and and look at the results,
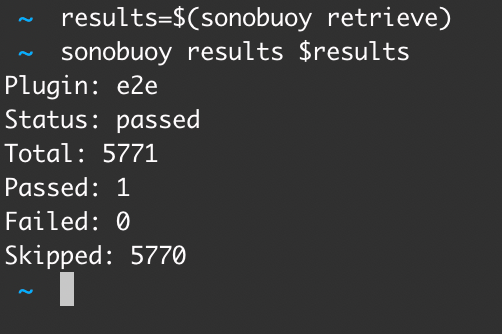
“results=$(sonobuoy retrieve)” pulls the tarball in, and “sonobuoy results $results” pulls the actual results to the screen so you can see how things went. You can run “sonobuoy run --wait” for a longer more in depth scan, that would probably be better for production clusters, but for now this is good for our little Pi. To clean up run “sonobuoy delete --wait” to remove the everything sonobuoy created. For more informatioon on Sonobuoy and all the things it can do, checkout the documentation at https://sonobuoy.io/docs
Octant
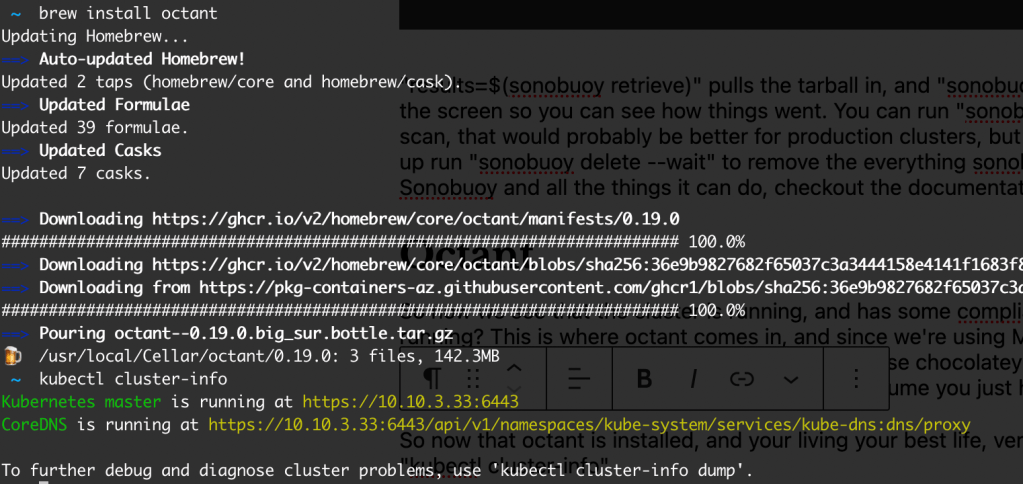
So now we see that the cluster is running, and has some compliances that are good. What about what is running? This is where octant comes in, and since we’re using Mac, its simple “Brew install octant” for those using windows and hating life everyday, you can use chocolatey to install using “choco install octant“. If your running windows and not using chocolatey, I’ll assume you just hate yourself.
So now that octant is installed, and your living your best life, verify your connection to the cluster by running “kubectl cluster-info“
Next simply run “octant” to start up the gui interface locally.

Not only does this create the dashboard, but it starts it for you as well! In my opinion this is pretty awesome for VI Admins that are not quite there with the kubectl commands yet. Here is a quick video of some stuff you can do in octant:

Pretty cool stuff too play around with on one single kubernetes cluster RUNNING ON A SINGLE RASPBERRY PI! True Octant isn’t really running ON the cluster, but it does run some checks within the environment. This can also be done using the kubernetes dashboard found here: https://kubernetes.io/docs/tasks/access-application-cluster/web-ui-dashboard/ but you may run into some KUBECONFIG, or TOKEN errors, so that will be a different blog where we create a God User(to see the process), and then verify the users creds for logging into other areas and doing things. That may be one or two blogs down the pipe. Helm is next. Cause I love package managers.
