
In this part two, we have an endpoint with your vcenter, we have a fabric group to consume those resources, now that the infrastructure is prepped, it’s time for the squishy element….those dang humans.
In my previous post, we brought in AD, so users can be utilized from the domain to populate groups. These groups are critical to dividing your resources up, and allowing your users to consume it.
Business Groups
So now that users are a part of the solution, let’s divide them into groups called “Business Groups”. These groups have layered roles that will allow individual group management and resource management. Let’s go through that:
in vRA go to “Administration ->Business Groups” and the green “+ New” sign for new.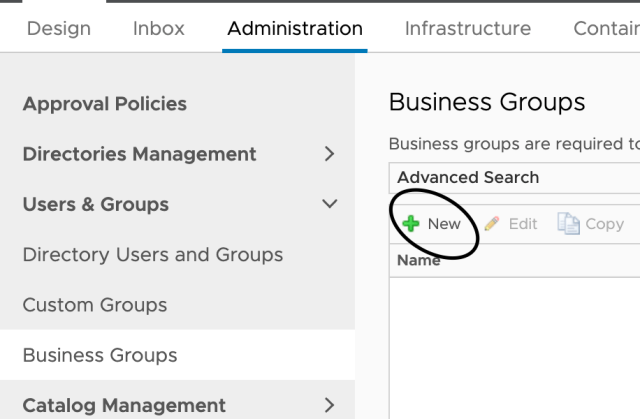
From here you will see the set for the group. You can include the name, Description, email for capacity alerts, and custom properties (if this business group ALWAYS has the same properties).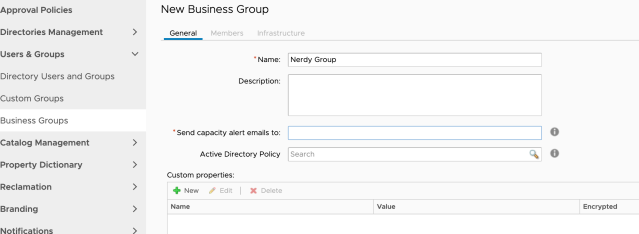
The next page will allow you to select the members of the group. This allows you to disect the group and allow layered rights as needed for the group. Here is a snippet from VMware about the rights:
| Group manager role | Can create entitlements and assign approval policies for the group. |
|---|---|
| Support role | Can request and manage service catalog items on behalf of the other members of the business group. |
| Shared access role | Can use and run actions on the resources that other business group members deploy. |
| User role | Can request service catalog items to which they are entitled. |
Now, create the roles as needed. Here is an example:
Click Next. You will see the settings for a custom name and AD group. Now you can set these dynamically in the blueprints, which is what I prefer, but if the AD OU is always the same for that group, AND the naming is a standard constant(always DC-APP-SRV*** for all servers) you can utilize these fields: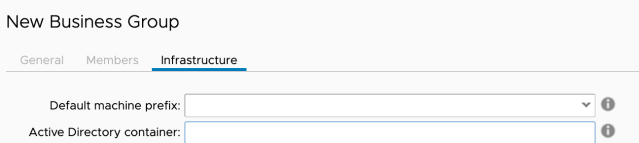
Now you’ve created a business group. It’s time to create reservations. Let’s start with the Reservation Policy.
Reservation Policy
The reservation policy is kind of like a tag. The policy is used in blueprints to simply label a Reservation to be utilized by the policy. To create one, go to “Infrastructure -> Reservations -> Reservations policy” CLick the “+ New” to add a policy:
Now we have a group and policy, Let’s make our reservation and grant resources to the users.
Reservations
Reservations are basically what they sound like. They reserve resources for the users to utilize. Once the resources defined in the reservation are exhausted the deployments fail stating “No Resources Available.” Pretty nifty for those that need to put a harness on sprawling server builds. To get to Reservations, Go to “Infrastructure -> Reservations -> Reservations” Click the  to see the dropdown of possible endpoints. Of course we only have a center at this point, so select “vSphere(vCenter)” Here is an example of the first tab:
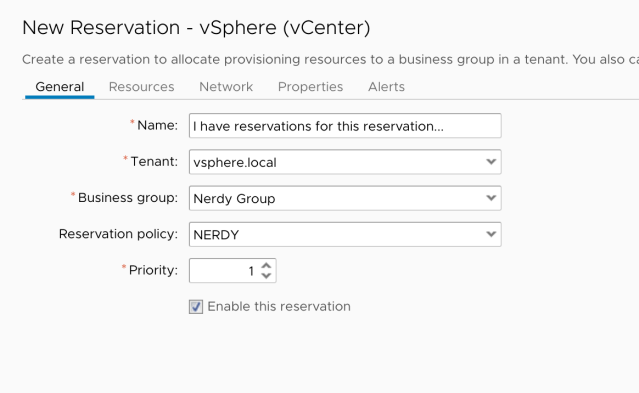
Now go to resources, and here you will see the actual resources in your vCenter. After you select your compute resource(Datacenter), You can set your quota, if you want a hard quota, the amount of Ram for the reservation, and the amount of storage and what storage cluster(I’m using VSAN) to use. Example: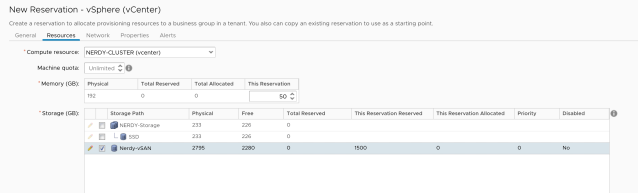
The next tab is all about the network. Here you will set what VLANs are allowed to be used by the group, and also if you have an IPAM solution in a Network Profile, it can be selected here. I have another blog about Networking in vRA here. Here is an example with the VLAN and policy:
The last two tabs(Properties, Alerts) I don’t really use much myself. I can set the alert to notify at specific resource usage but, I don’t normally use them. Maybe I’m a horrible human being? meh…
So now the framework is all in place, you got resources, you got users, but next it’s time to get blueprints!
